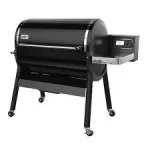
Junk!

IMO, the hopper insert is totally unnecessary. If yours is new, it likely is already installed anyway. The welded chute should be installed if you purchased recently. If not it took about a 1/2 hour to complete and I had a second set of hands to put back together easily. Remove the wire guard. Just don’t take all the screws out at the same time or the chute will be disconnected.
Okay, checking mine, it’s one of the newer, updated ones.
So what is the proper protocol to remove these screws?
 
I may? attempt to take some type of wire and run that in a X pattern, tightening it in the middle. Could use strong leather, etc to first wrap around each leg with wire then going over it to prevent wire from wearing into the legs. MAYBE a small screw above/below the wire to prevent it from moving up or down each leg. Stay tuned:
I’ll post photos of how I destroyed all of the legs. 🤬👎🏻🙄
Following.
 
I may? attempt to take some type of wire and run that in a X pattern, tightening it in the middle. Could use strong leather, etc to first wrap around each leg with wire then going over it to prevent wire from wearing into the legs. MAYBE a small screw above/below the wire to prevent it from moving up or down each leg. Stay tuned:
I’ll post photos of how I destroyed all of the legs. 🤬👎🏻🙄
I was thinking erector set type metal that would tie together like a box and then use this as a base for a storage shelf. I was hoping to see this from Weber by now as there are screw zerts installed in the bottom portion of the legs. I think you want to keep the legs from moving in or out. i actually feel that the original wheels would be plenty good enough if there were a sturdy shelf at the bottom.
 
I was thinking erector set type metal that would tie together like a box and then use this as a base for a storage shelf. I was hoping to see this from Weber by now as there are screw zerts installed in the bottom portion of the legs. I think you want to keep the legs from moving in or out. i actually feel that the original wheels would be plenty good enough if there were a sturdy shelf at the bottom.
I NEED to first ensure I have all the updates installed. Then I’ll tackle the leg issue.
 
I NEED to first ensure I have all the updates installed. Then I’ll tackle the leg issue.
Hey just offering an alternate perspective. Easy there big fella. 🤣
 
I was thinking erector set type metal that would tie together like a box and then use this as a base for a storage shelf. I was hoping to see this from Weber by now as there are screw zerts installed in the bottom portion of the legs. I think you want to keep the legs from moving in or out. i actually feel that the original wheels would be plenty good enough if there were a sturdy shelf at the bottom.
They make pre-punched angle iron with multiple round holes that could potentially do this. However it is not stainless and will rest. I am exploring the alternative of a thicker aluminum angle iron.
 
Hey just offering an alternate perspective. Easy there big fella. 🤣
Hey, didn’t mean that the way it came out. Just saying I’ll figure out the app stuff and then tackle the leg problem. Nothing personal. 👍👍👍👍👍
 
I was thinking erector set type metal that would tie together like a box and then use this as a base for a storage shelf. I was hoping to see this from Weber by now as there are screw zerts installed in the bottom portion of the legs. I think you want to keep the legs from moving in or out. i actually feel that the original wheels would be plenty good enough if there were a sturdy shelf at the bottom.
OR, or simply cut the legs off, tack weld the grill to a heavy duty table with “heavy duty legs” and smoke away. 😂 LOLROF
 
They make pre-punched angle iron with multiple round holes that could potentially do this. However it is not stainless and will rest. I am exploring the alternative of a thicker aluminum angle iron.
Yeah I was Thinking that as well after a Bit of thought. Then just drill where needed. That stuff is readily available at any box store and cheap IMO. I just know I’ll build something and the next week they will announce a product. 😂
 
OR, or simply cut the legs off, tack weld the grill to a heavy duty table with “heavy duty legs” and smoke away. 😂 LOLROF
There’s a YouTube guy who built his in basically doing as you described. Great minds and all. 😜
 
I am also looking at purchasing some steel or aluminum tubing of 1” to 1.5” diameter to fit the front and back legs, make a concave radius to fit the contour of the the leg pipes, and then uses star inserts to connect those to the existing leg threaded it holes.

It then would be simple to mount a platform to the tubing.p, or have my local welding shop make a couple of stainless steel shelves to fit over them.

I got this idea from Weber and the way they used to assemble their old Summit 600 series rolling carts.
 
Interesting twist today. Thought I had received the newer welded auger hopper assembly when I purchased my unit, as it had the revision “F” motor and new hopper chute. It has worked flawlessly for almost 50 cooks.

Today I accidentally dropped a pebble into the hopper (don’t ask) while refilling pellets and did not want to damage the auger...emptied bin, removed motor assembly and found I had the old separate auger and tube, and that the gasket was frayed and coming unglued.

I contacted support via their online help, asked how to replace the gasket, and within 2 hours they sent me an email saying they were sending me a new welded assembly to replace the original. An hour later received a note that the assembly would be shipped tomorrow via Fed Ex.

THAT IS CUSTOMER SERVICE WITH A CAPITAL “S”!!!!

Gotta’ love how they stand behind their products; especially when approaching them with respect.
 
They make pre-punched angle iron with multiple round holes that could potentially do this. However it is not stainless and will rest. I am exploring the alternative of a thicker aluminum angle iron.
What is this piece of metal that is showing on the front of this EX6? I don’t have it on mine. Also, is there a special way that the five piece grates are supposed to be inserted?
 

Attachments

  • C3899816-42FD-4BB3-AD54-D2F04040520E.jpeg
    C3899816-42FD-4BB3-AD54-D2F04040520E.jpeg
    12.2 KB · Views: 43
What is this piece of metal that is showing on the front of this EX6? I don’t have it on mine. Also, is there a special way that the five piece grates are supposed to be inserted?
No idea...I not have the EX4.
 

Create an account or login to comment

You must be a member in order to leave a comment

Create account

Create an account on our community. It's easy!

Log in

Already have an account? Log in here.

Back
Top